
The Ultimate Guide to Interior Painting Prep
Prepping your walls for painting often feels like an unnecessary chore, but here's the truth: proper preparation is the secret to a flawless, professional-grade paint job. Skipping crucial prep steps can result in uneven finishes, peeling paint, or cracks that ruin all your hard work. To save yourself time, effort, and frustration down the line, taking the prep process seriously is essential.
This guide will walk you through every step of interior painting preparation, from inspecting imperfections to priming walls, while offering expert tips and recommended tools to simplify the process. By the end, you'll be ready—and confident—to tackle your DIY project like a pro.
The Secret to a Flawless Paint Finish
Before we jump into the steps, it's worth understanding why preparation matters so much. A smooth, long-lasting paint finish isn't just about the quality of paint you use—it's also about addressing issues lurking beneath it.
Here’s what proper prep work solves and prevents:
- Dust, Dirt, and Grease: These can prevent paint from adhering properly, resulting in streaks or patchy finishes.
- Cracks, Holes, and Uneven Textures: Left untreated, these will still show after painting and can worsen over time.
- Improper Adhesion: Primer prepares your walls to hold paint evenly, avoiding peeling or cracking later on.
The right tools and materials—like spackling, caulking, and primers—make all the difference. Armed with these, you're well on your way to a smooth and durable finish.

Set Yourself Up for Success
Start with a Clean Slate
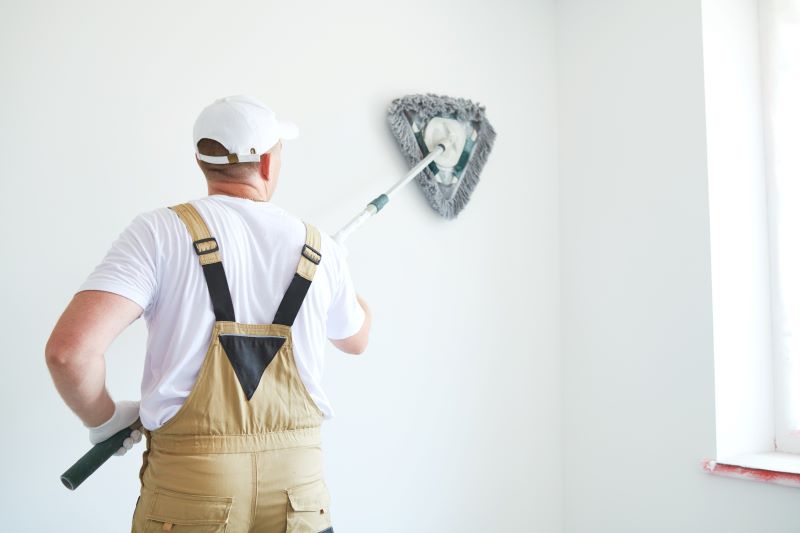
Paint can't adhere properly to dusty, greasy, or dirty walls. Take the time to clean your surfaces before you begin.
- Use a microfiber cloth or sponge with mild detergent to wipe down walls. For kitchen areas, where grease is more likely, try a degreasing cleaner.
- Don't forget to remove cobwebs from corners or dust off baseboards—the little details matter!
Protect Your Space
Preparation doesn’t just stop at walls—you’ll want to safeguard your furniture, floors, and fixtures while you work.
- Cover furniture with drop cloths or move it out of the room entirely.
- Lay down a protective floor covering, like a tarp or contractor-grade paper, to catch any drips or spills.
- Use painter’s tape to mask baseboards, trim, window frames, and any other tricky areas. For clean edges, press the tape firmly and ensure it adheres fully.
Pro Tip: Invest in high-quality painter's tape for sharp, clean lines. Cheap alternatives tend to bleed paint through edges. For the best results, remove the tape while the paint is still slightly wet to prevent it from lifting the paint.
Inspect and Address Wall Imperfections
Find the Weak Spots
Closely inspecting your walls is crucial to catch imperfections before applying paint. Watch out for:
- Nail holes
- Hairline cracks or stress fractures
- Areas where old paint is peeling
- Uneven textures from previous repairs
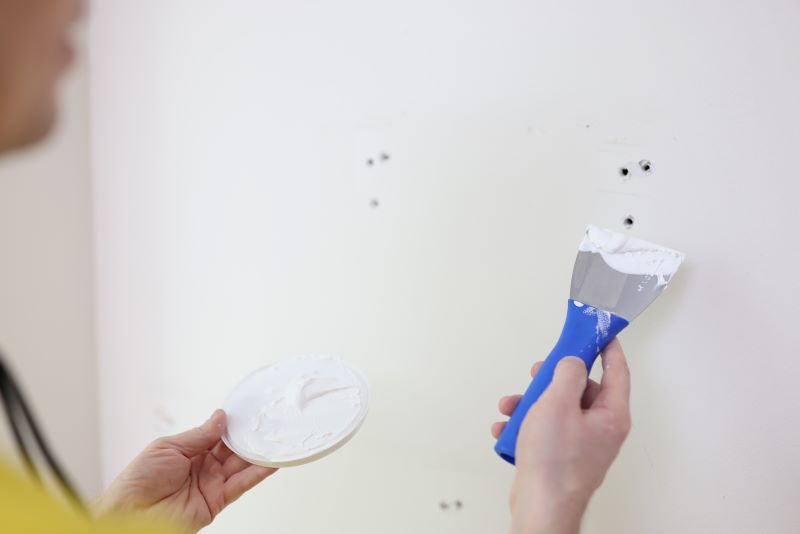
Fix it Right
Once you've identified imperfections, use these materials to fix them up:
- Spackling: For small holes or dents, apply a lightweight spackling compound using a putty knife. Products like FAST 'N FINAL Lightweight Spackling make repairs quick and effortless.
- Caulking: Seal gaps between trim, baseboards, and moldings with caulking. For high-moisture rooms, such as bathrooms, use waterproof sealants for added durability.
- Texture Repair: Patch uneven textures or blend repaired areas using wall texture repair products. Refer to our blog posts on How to Match & Repair Wall & Ceiling Textures for guidance.
Reminder: Silicone sealants, commonly used in kitchens and bathrooms, cannot be painted over. Be sure to check out next week's post, where we’ll discuss whether to caulk before or after painting!
Prime for Perfection
Don’t Skip the Primer
Primer is your paint job’s best friend. It ensures the perfect finish by:
- Improving paint adhesion
- Blocking stains or discoloration
- Creating a uniform surface color for your topcoat
Choose the right primer for your needs:
- Bare Drywall: Opt for a drywall primer-sealer to prep raw surfaces.
- Stain Covering: Use a stain-blocking primer for walls with tough marks or discoloration.
- Dark to Light Transition: A tinted primer can save you multiple coats of lighter paint.
Short on Time? Products like FAST 'N FINAL Lightweight Spackling and FAST DRY Premium Spackling don’t require priming, saving you extra steps!
Pro Tips for a Professional Look
Sand for Smoothness
Sanding is the key to achieving an ultra-smooth surface. Use medium-grit sandpaper (120–150 grit) for patched areas, and finer sandpaper (220 grit) to smooth walls prior to painting.
Dust thoroughly after sanding—any residue can interfere with paint adhesion.
Pay Attention to Details
Double-check your trimming, corners, and edges for any gaps, imperfections, or stray tape. Refining these details now creates a polished result later.
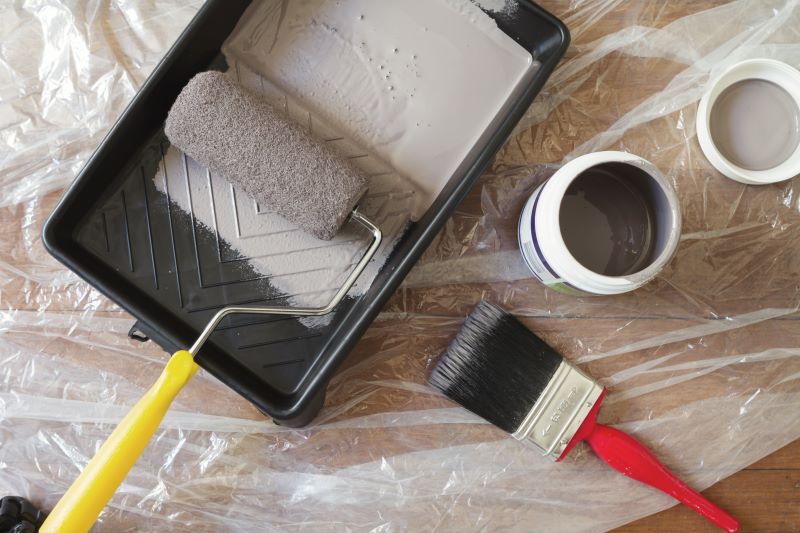
Plan Your Tools
Professional results require professional-grade tools. Ensure you have:
- High-quality brushes for precise application
- Durable rollers for even coverage
- Paint trays and extenders for reaching high walls or ceilings
Consider investing in angled brushes for perfect trim lines and edging.

Why Preparation Saves You Time (and Money)
Skipping proper surface prep might seem like a time-saver, but it often leads to costly mistakes and unsatisfactory results. Without the right preparation, issues like peeling paint, uneven finishes, or persistent imperfections can arise, leaving you needing to redo the work or invest in expensive repairs. Here's why taking the time to prep is worth it:
- Durability: Properly prepped walls hold paint better, ensuring a smoother, longer-lasting finish. Skipping this step can lead to chipping, bubbling, or peeling over time, meaning you’ll have to repaint sooner than you’d like.
- Cost Savings: Fixing small imperfections like cracks, holes, or uneven surfaces before painting prevents larger, more expensive problems down the line. Neglecting these issues now could mean extra repair costs later.
- Professional Results: Prepping creates a clean, smooth canvas that allows paint to adhere evenly, giving you that polished, professional look without streaks or blemishes.
Think of prep as an investment in lasting quality and a finished product you’ll be proud of. While it might take a little extra time upfront, it saves you from headaches, frustration, and added expenses in the future. In short, the effort you put into preparation always pays off!
Recommended Products to Simplify Your Prep
Prep Like a Pro - Essentials You Can Trust
Here’s your ultimate list of prep must-haves, organized for a smoother workflow:
- Drop Cloths or Tarps: Protect floors and furniture from paint spills and dust.
- Sandpaper or Sanding Sponge: Smooth surfaces to ensure a professional finish.
- Lightweight Spackling Compound (e.g., FAST 'N FINAL): Perfect for quick, smooth wall repairs.
- Putty Knife: Helps apply spackling or scrape away old paint.
- Caulking and Sealants: Ideal for sealing gaps and ensuring durability in high-moisture areas.
- Texture Repair Products: Blend or smooth uneven finishes with ease.
- Painter’s Tape: Achieve sharp, clean edges with no bleed-through.
- Paintbrushes and Rollers: Essential for even paint application across various surfaces.
- Paint Tray and Liners: Makes loading paint onto brushes or rollers cleaner and more efficient.
- Stir Sticks: Ensure your paint is well-mixed for consistent color and texture.
- Step Ladder: Reach higher areas safely and with ease.
- Utility Knife: Great for cutting tape, trimming materials, or opening paint cans.
- Rags or Cleaning Cloths: Handy for quick clean-ups and wiping down surfaces.
Looking for more detailed guidance? Check out our All About Wall Repair: Spackling Guide for expert tips!
Step-by-Step Painting Prep Checklist
Get your space ready for a flawless paint job with these simple steps:
- Wash walls with a cleaner to remove dirt and grease.
- Move furniture or cover it with drop cloths to protect from spills.
- Fill cracks and holes with spackling or caulk, then smooth them out.
- Sand repaired spots and wipe away any dust.
- Use painter’s tape to mask edges and trim.
- Apply primer and let it dry completely.
- Gather your brushes, rollers, and trays—you're ready to paint!
Your Prep Work Pays Off
While prepping your walls for paint may add extra steps, the payoff speaks for itself. A smooth, flawless wall finish starts with addressing imperfections and ensuring surfaces are primed for success. By investing time upfront, you not only enhance the quality of your paint job but also increase its longevity.
Trust in quality tools and products to make the process easier and achieve professional-grade results. Feel free to explore our full line of spackling, caulking, and primer solutions to help you tackle your next project with confidence.