
Should You Caulk Before or After Painting?
When undertaking painting projects in your home, paying attention to detail can significantly influence the final outcome. One crucial step that homeowners and DIY enthusiasts often overlook or feel uncertain about is caulking. Caulk is essential for sealing gaps, protecting against moisture, and achieving a polished finish, making it a vital component in creating a professional and long-lasting appearance.
A common question many people have is whether to caulk before or after painting. The answer can vary depending on the specific needs and goals of your project.
This guide will clarify the debate by comparing both methods, examining their use cases, and helping you determine which approach is best suited for your upcoming home improvement project.
Understanding Caulking and Its Importance
Caulking serves multiple purposes in home improvement projects. It’s a flexible material applied to seal gaps, cracks, or seams in various surfaces. Whether you’re painting walls, trim, or an exterior surface, caulking improves both the durability and aesthetics of the finished product.
Here’s how caulking contributes to your project’s success:
- Seals Against Moisture: Prevents water damage by blocking entry points where leaks could occur.
- Enhances Energy Efficiency: It fills cracks that may cause drafts, helping regulate indoor temperatures.
- Provides a Polished Finish: Covers unsightly gaps and seams that would otherwise be highlighted after painting.
When paired with a good paint job, caulk ensures a seamless, professional-looking result every time.
Should You Caulk Before Painting?
Caulking before painting is a widely recommended approach because it helps create a flawless, durable finish. By sealing gaps, cracks, and seams ahead of painting, you eliminate surface imperfections, ensure better adhesion, and allow the caulking to be seamlessly disguised under the paint. Here's where it works best:
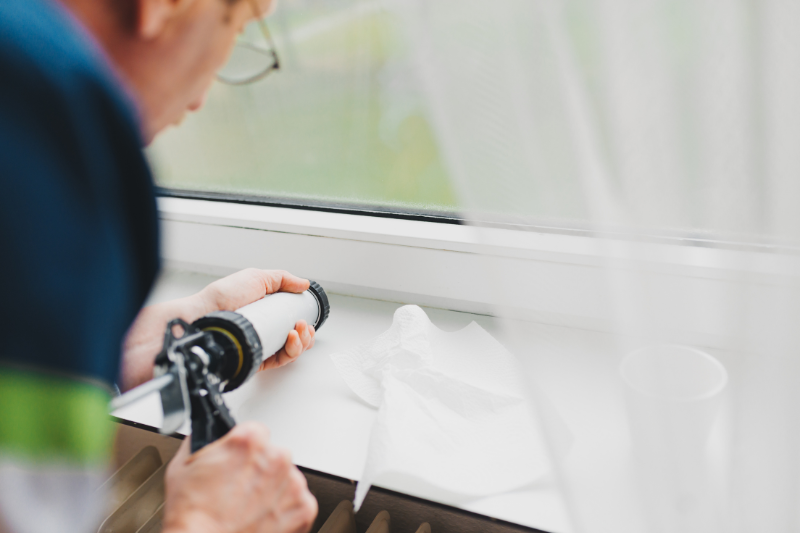
Interior Applications
- Trim Gaps: Baseboards, crown moulding, and window frames often have small gaps that need caulking for clean, sharp paint lines.
- Drywall Seams: Cracks or gaps around drywall seams and corners can ruin the look of a painted wall. Pre-paint caulking smooths these areas for even coverage.
- Woodwork Cracks: Features like wainscoting or decorative beams often develop cracks. Sealing them ensures a cohesive painted appearance.
- Built-In Fixtures: Cabinets or shelving look seamless when gaps around their edges are caulked.
- Settling Cracks: Small cracks from natural home settling, especially in corners or along trim, benefit from pre-paint caulking.
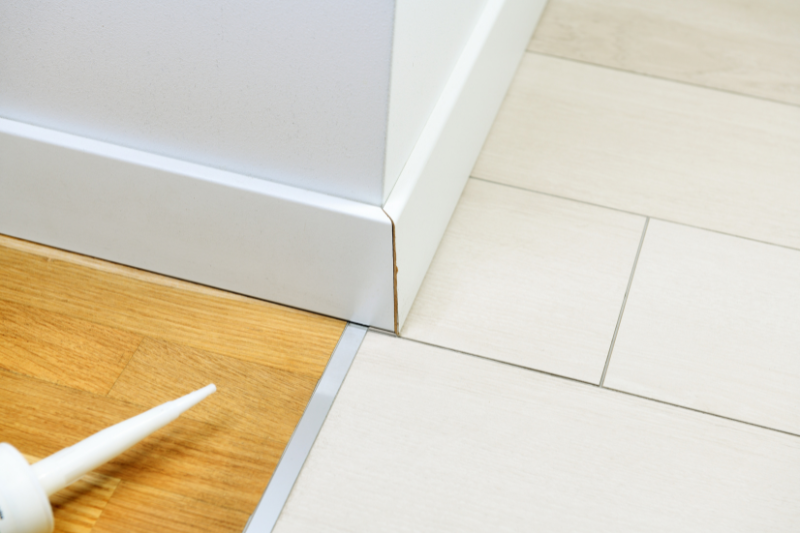
Exterior Applications
- Siding Gaps: Sealing cracks in wood, vinyl, or fibre cement siding prevents moisture damage and ensures paint stays intact.
- Outdoor Trim: Filling gaps around windows and doors enhances durability and blocks moisture.
- Cracks in Woodwork: Railings, decks, or pergolas last longer with pre-paint caulking to seal splits and weatherproof surfaces.
- Masonry Repairs: Small cracks in brick, stucco, or concrete get smoothed for better paint adhesion and protection.
- Transition Areas: Materials like trim, meeting siding, or gutters benefit from caulking to improve waterproofing and the paint finish.
Why It’s Worth It
A little effort in pre-paint caulking goes a long way. It guarantees smooth surfaces, protects against wear, and gives your project a polished, professional look, whether indoors or out.
Should You Caulk After Painting?
While less common, applying caulk after painting is ideal in certain scenarios where precision or specific functionality is needed. This approach allows you to fix imperfections, enhance the aesthetic, or add functional protection. Here are some situations where post-paint caulking is a smart choice:
Interior Applications
- Touching Up Minor Cracks: Post-painting can reveal small cracks or gaps that were overlooked. Applying caulk to these areas ensures a smooth finish without repainting. For example, hairline cracks around doorframes are easy to seal after paint has dried.
- Using Decorative or Clear Caulks: Decorative trim or detailed woodwork may require clear caulk for a seamless look. Applying after painting prevents the caulk from interfering with your design.
- Sealing Around Fixtures: Spaces between painted walls and outlets, switches, or vent covers can be filled with caulk to create a polished, finished look.
Exterior Applications
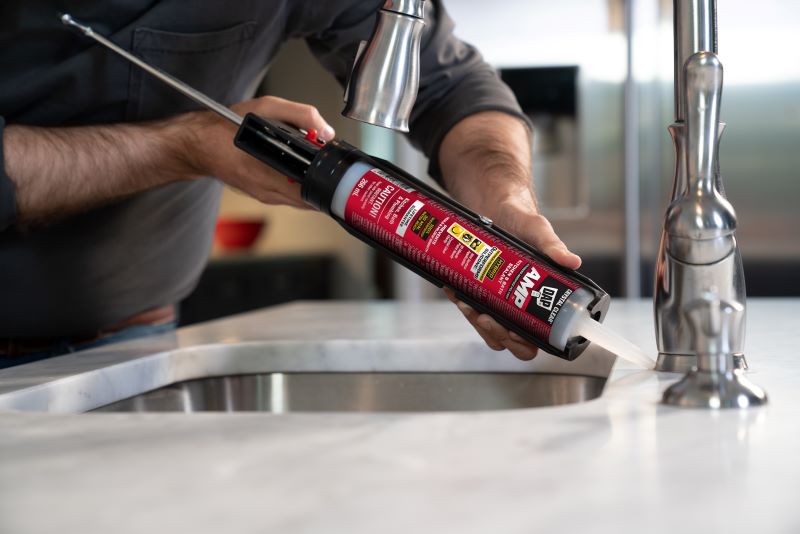
- High-Moisture Areas: Silicone or other non-paintable caulks are perfect for sealing gaps in areas prone to water, such as around windows, doors, or outdoor faucets. Applying these after painting ensures long-term durability without disrupting the finish.
- Late Adjustments: If gaps near siding, trim, or masonry joints become visible post-painting, caulk can be carefully applied to seal these without the need for retouching. We offer caulking options in colors that match common siding and blend seamlessly with masonry for a flawless finish.
- Quick Fixes on Outdoor Surfaces: Post-painting caulk is great for minor touch-ups on exterior features like fences or railings where seasonal wear may cause small cracks to appear.
Why It Works
Applying caulk after painting lets you fine-tune your project. Whether it’s smoothing out overlooked imperfections or adding functionality with clear or moisture-resistant caulks, this approach enhances both the durability and aesthetics of your work.
Tips for a Perfect Finish and Long-Lasting Results
When it comes to caulking, selecting the right type and applying it correctly can make all the difference in your project’s finish and durability. Here’s everything you need to know to avoid common pitfalls and achieve a seamless result.
Paintable vs. Non-Paintable Sealants
Paintable caulks, such as acrylic or latex-based options, are designed for easy paint adhesion, making them ideal for wood trim, drywall, moulding, and baseboards. On the other hand, non-paintable silicone-based sealants are highly durable and waterproof, perfect for areas like kitchens, bathrooms, and other high-moisture environments. Always check the packaging for “paintable” or “non-paintable” labels to ensure compatibility with your project needs.
Key Factors to Consider
The timing and type of caulk depend on several factors:
- Surface Type: Use paintable caulk pre-paint for wood and drywall, while metal often pairs better with silicone caulk applied after painting.
- Type of Caulk: Non-paintable caulks should generally be applied post-paint.
- Environment: High-moisture spaces like bathrooms require waterproof silicone sealants for long-lasting results.
- Finish Goals: For a polished, seamless look, apply caulk before painting; for touch-ups, post-paint caulking can work better.
Avoiding Common Mistakes
- Don’t paint over non-paintable caulk—it won’t adhere.
- Never skip caulking, as it can leave unsightly cracks after painting.
- Always match the caulk type to the environment.
Pro Tips for a Flawless Finish
- Use the Right Tools: A quality caulking gun and smoothing tools will ensure a clean, professional application.
- Be Patient: Allow enough curing time for both the caulk and paint to ensure proper adhesion and durability.
By understanding the differences between paintable and non-paintable caulks and following these best practices, you can ensure your project not only looks great but also stands the test of time. Whether it’s sealing trim, protecting against moisture, or achieving smooth finishes, the right caulk makes all the difference.

Perfect Your Painting with Smart Caulking Choices
Deciding whether to caulk before or after painting comes down to your project’s unique needs. Preparing surfaces with caulk before painting creates clean lines and professional results, while post-paint caulking is great for touch-ups and decorative finishes.
Take the time to choose the right type of caulk and follow best practices for application. Whether you’re sealing trim, repairing cracks, or enhancing durability, caulking is the unsung hero of any paint project.
Want even more tips? Check out our related guides like A Beginner's Guide to Caulks & Sealants or The Ultimate Guide to Interior Paint Prep for expert advice.