
Painting House Interiors: Essential Prep and Pro Tips
Does your living room feel a bit tired? Maybe the kitchen walls are looking a little worse for wear? A fresh coat of paint is one of the most impactful ways to transform your home. It breathes new life into a space, making it feel clean, modern, and uniquely yours. But for many homeowners, the idea of tackling a painting project can feel overwhelming. Where do you start? What tools do you need? And how do you get those crisp, professional-looking lines?
The truth is, painting isn't just for the pros. With a little patience and the right preparation, anyone can achieve a beautiful finish. This guide walks you through the entire process. You've got this!
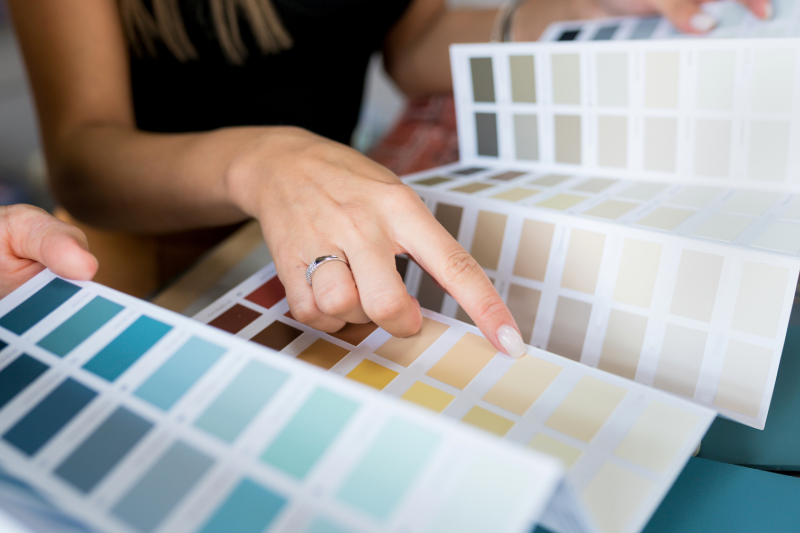
Choosing the Right Paint Finish
Before you pop the lid on a paint can, you need to choose the right finish for your room. The "sheen" or finish determines how shiny the paint looks and how durable it is
- Matte or Flat: Great for low-traffic areas like bedrooms or ceilings. It hides imperfections well but can be harder to clean.
- Eggshell: A popular choice for living rooms and dining rooms. It has a soft, velvety appearance and is easier to wipe down than matte paints.
- Semi-Gloss: The go-to for kitchens, bathrooms, and trim. It stands up to moisture and scrubbing, making it perfect for high-traffic zones.
How to Calculate How Much Paint You Need
Nothing kills the DIY vibe faster than running out of paint halfway through a wall—or ending up with three extra gallons you can't return. A little math now saves money later.
Golden Rule of Paint Coverage: One gallon of paint usually covers 350–400 ft².
Use a tape measure to find the height and width of each wall (in feet). Multiply the height by the width to calculate the surface area of each wall in square feet (ft²), then add the areas together and subtract the surface area of windows and doors to get your total.
- Calculating Wall Area
Height (ft) × Width (ft) = Area (ft²) - Calculating Total Paintable Surface
Total wall area (ft²) − Window area (ft²) − Door area (ft²) = Total paintable surface (ft²) - Calculating Paint Required
Total paintable surface (ft²) ÷ 350 = Gallons needed for 1 coat
Note: One gallon typically covers about 350 ft² per coat.
As a rule of thumb, one gallon will cover an average bedroom (approximately 12x12 ft) for one coat. Buying two gallons covers two coats and leaves a bit for touch-ups.
How Many Coats?
Darker colours may need two or more coats to reach full richness—using a tinted primer first can help reduce the total number of coats. If you're covering a dark colour with a light shade, plan on extra coats. In general, aim for two coats to ensure even, professional-looking coverage.
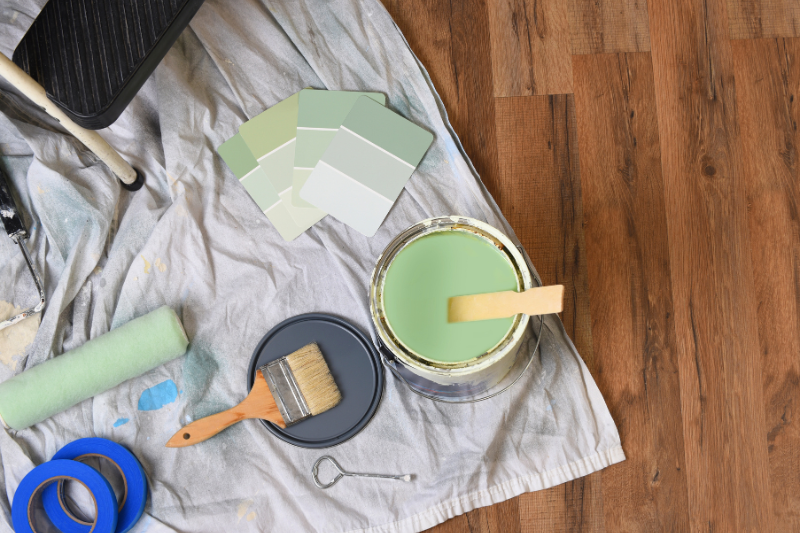
Gathering Your Tools
Here's a simple list of what you'll need to get the job done right, along with a quick note on what each tool is for:
- Sponge, Microfibre Cloths, Bucket and Mild Cleaner: For cleaning walls before painting
- Drop Cloths or Plastic Sheeting: Protects floors and furniture from drips and splatters
- Step Ladder: Helps you safely reach ceilings and high corners
- Spackling, Putty Knife and Sanding Block: Fills and smooths small holes and surface imperfections
- Caulking, Caulking Gun and Smoothing Tool: Seals gaps and cracks around trim and baseboards
- Painter's Tape: Shields trim, ceilings, or patterns for neat, clean lines
- Paint Tray: Holds and distributes paint for rolling
- Paint: Your chosen colour and finish for the project
- Paint Can Opener, Stirrer, Hammer: Opens cans, mixes paint, and secures lids for storage
- Angled Sash Brush: For cutting in around edges, corners, and trim
- Roller Frame, Roller Covers and Extension Pole: Covers large walls quickly and helps you reach higher areas
Prepping the Room and Surfaces
A clean, empty canvas is easier to work with. Start by moving furniture to the center of the room and covering it with plastic sheeting. Lay down canvas drop cloths to protect your floors—canvas stays in place better than plastic, which can be slippery.
Washing the Walls
Cleaning your walls before painting is an important step to ensure your new coat of paint adheres properly. Use a mild soap and warm water to remove dirt, grease, or stains that may interfere with the paint's finish. For tougher spots, a sponge or soft-bristle scrub brush can help tackle the buildup. Be sure to rinse the walls thoroughly with clean water and allow them to dry completely before moving on to the next step.
Next, wash your walls. It might seem like an unnecessary step, but paint struggles to stick to dust and grease. A sponge with warm water usually does the trick. For kitchens or bathrooms where grease and grime build up, use a small amount of grease-cutting detergent. Wipe away any residue with a damp cloth and let it dry completely.
Use Spackling to Fill Holes & Smooth Imperfections
Now, look for imperfections. Small dings and nail holes will show through your new paint if you don't fix them first.
- For small nail holes: Try FAST 'N FINAL Lightweight Spackling. It dries quickly and often requires zero sanding.
- For larger repairs: If you have bigger dents, FAST DRY Premium Spackling is a great option that gets you painting sooner.
Want a deeper dive on repairs? Read our full guide: All About Wall Repair: Spackling Guide
Use Caulking to Fill Gaps & Cracks
Next, take a close look at the gaps between your trim and the walls. If you spot any cracks, it's time to fill them with a quality, paintable caulk. Using the right caulk is key to ensuring your paint job lasts.
We recommend products like ALEX ULTRA, ALEX FLEX, or EXTREME STRETCH because they offer great flexibility. This means they will move and shift with your home, preventing cracks from reappearing through your new paint.
While most pros caulk before painting, some do it after. If you're curious about which method is best for your project, read our guide: Should You Caulk Before or After Painting?
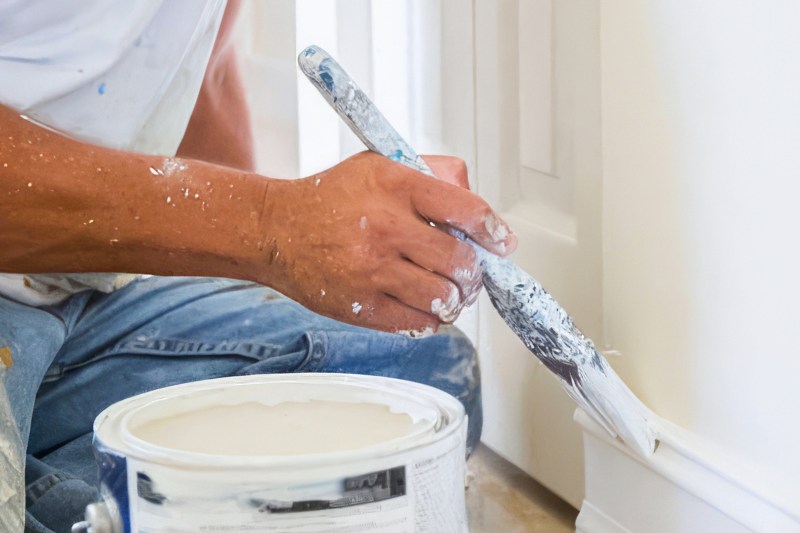
Painting Trim & Using Painter's Tape
You've finished caulking and are ready to paint, but what should you tackle first—the trim or the walls? We recommend starting with the trim. It's easier to tape off the trim than the walls, giving you cleaner, more precise results.
When it comes to painter's tape, the goal is to get a razor-sharp, clean line. To help you achieve a professional-looking finish, here are a few pro tips to prevent paint from bleeding under the tape:
- Seal the Tape with Paint: After applying painter's tape to your trim, paint over the edge of the tape with your trim colour. This clever trick ensures that any paint that bleeds under the tape will match the trim, making it invisible. Once that coat is dry, you can paint your walls. When you peel the tape away, you'll have a perfectly clean line. See this technique in action here.
- Seal the Tape with Caulk: Apply your tape, then run a very thin bead of paintable latex caulking, like ALEX PLUS, along the edge of the tape. Wipe away any excess immediately with a damp cloth, leaving just enough to seal the gap. This creates a foolproof barrier that guarantees a crisp line. Watch how it works here.
- Pro Tip: Before you start, check if your painter's tape has a water-activated sealing feature. Some tapes require you to wipe them with a damp cloth to create the best seal.
Finally, knowing when to remove the tape is key. For the cleanest results, remove the tape immediately after you've applied your final coat of paint. If you wait for the paint to dry completely, it can be nearly impossible to remove the tape without causing imperfections or peeling. Pull the tape slowly and steadily at a 45-degree angle away from the freshly painted edge to reveal your sharp, clean line.
For a complete guide on trim, read: Trim it Right: Pro Tips for Perfectly Painted Trim & Baseboards
Painting the Ceiling
Do You Need to Paint the Ceiling?
Painting the ceiling isn't always necessary, but it's a step worth considering for a refreshed, cohesive look.
- Brightens the Space: A yellowed, stained, or dull ceiling can drag down the room's appearance. A fresh coat of paint instantly revitalizes and brightens the entire space.
- Creates Cohesion: If you're painting your walls bright white, updating the ceiling ensures a crisp, unified look throughout the room.
- Elevates Your Design: Painting the ceiling to match your walls or opting for a bold statement colour is a growing trend that can completely transform the mood and style of your space.
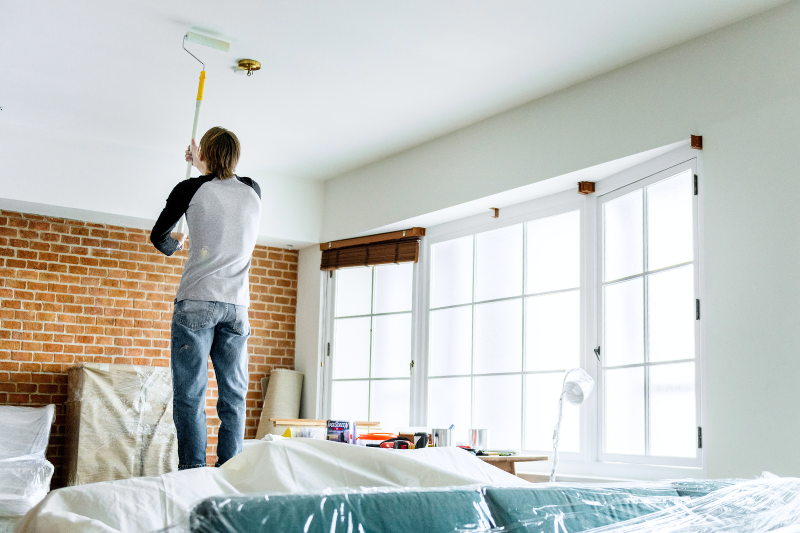
Ceiling Painting Tips
- Always start at the top—gravity's got a mind of its own and drips happen! By tackling the top first, you'll catch any rogue splatters before they can mess up those freshly prepped walls.
- Just like with the walls, clean the surface. Use a broom or vacuum to remove dust and cobwebs.
- Double-check that all flooring, light fixtures, and wall décor are protected.
- Flat or matte paint is usually the best choice for ceilings. It hides imperfections and reduces surface texture.
- Use a roller with an extension pole to reach overhead without straining. Work in 1-square-meter sections, starting in a corner and moving across the ceiling in parallel strips.
- Reload your roller regularly for even coverage, and avoid pressing too hard (which can cause splatters).
Popcorn Ceilings: While less popular today, they're still common in older homes. Avoid repeatedly rolling over the same spot when painting, as the texture can loosen and peel when wet. If you're not ready to remove all the popcorn, try our POPCORN 2-in-1 Wall & Ceiling Spray Texture for quick touch-ups.
Applying Paint: Cutting-in and Rolling Techniques
This is where your preparation pays off! Achieving a clean, even finish is all about patience and technique.
Cutting-In Like a Pro
- Dip just the tip of your angled brush (about 1/3 into the paint) to avoid overloading.
- Carefully paint a 2-3 inch border along edges, corners, and around trim or outlets.
- Work one wall at a time, and always cut in immediately before rolling that section. This keeps the paint "wet" so the brushed edge blends seamlessly with rolled areas—avoiding those faint "picture frame" lines.
- For extra crisp lines, steady your hand by resting part of your hand or forearm against the wall as you move along.
Rolling for Even Coverage
- Choose the right roller nap: 10-13 mm (3/8 to 1/2 inch) is ideal for most interior walls; use a thicker nap for textured surfaces, and a shorter nap for ultra-smooth finishes.
- Load your roller evenly by rolling it back and forth in the tray until fully covered but not dripping.
- Start by rolling a large "W" or "M" pattern on the wall, then fill in the shape with overlapping vertical strokes. This technique spreads the paint evenly and helps catch any missed spots.
- Always maintain a "wet edge"—work quickly enough so each section of paint overlaps a still-wet area. This prevents visible lines and ensures a uniform finish across the wall.
- Don't press too hard on the roller, which can cause paint to splatter or leave streaks; gentle, even pressure works best.
- Reload your roller frequently to maintain coverage, but avoid excessive paint, which can lead to drips.
Final Tips for Success
Once you've finished rolling a section, resist the urge to go back over drying paint—let it set to avoid marks and uneven texture.
Let the first coat dry completely (check your paint can for recommended drying times) before deciding if a second coat is necessary. Most projects benefit from two coats for rich, consistent colour.
With these tools and techniques, you'll paint like a pro and achieve those smooth, vibrant walls that make any room feel brand new.

Start Your Painting Project with Confidence
Taking on an interior painting project is a rewarding way to invest in your home. It's amazing what a difference a weekend and a few gallons of colour can make. By focusing on proper prep work—like patching those holes and taping that trim—and taking the time to calculate your materials, you set yourself up for a stress-free experience.
Remember, every pro was once a beginner. With these tips and the right tools, you're ready to create a space you love.
Learn More
- DAP Fast N Final Lightweight Spackling
- DAP® Fast Dry Premium Spackling
- ALEX® ULTRA Advanced Latex Sealant
- ALEX FLEX Premium Molding & Trim Acrylic Latex Siliconized Sealant
- EXTREME STRETCH Acrylic Urethane Premium Elastomeric Sealant
- DAP Alex Plus All-Purpose Caulk
- 2in1 Wall & Ceiling Spray Texture: Popcorn Water Based