
How to Properly Seal Exterior Lights and Fixtures
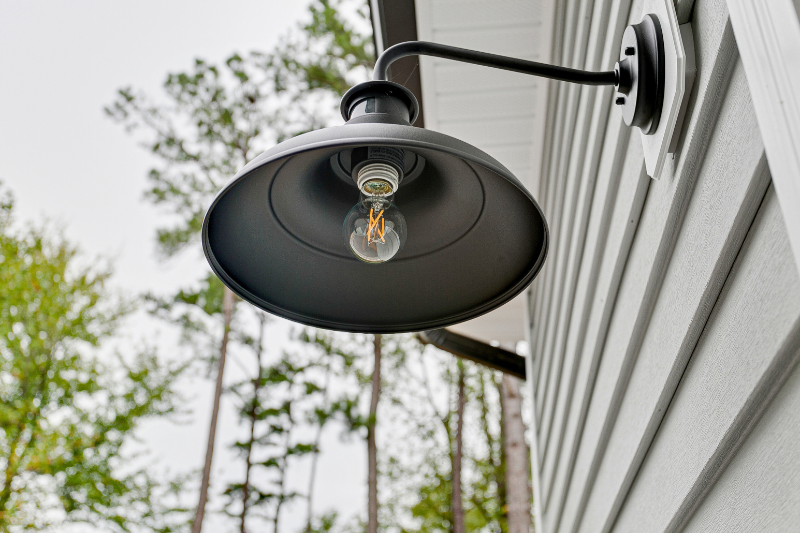
Exterior lights and fixtures add beauty and security to your home, but they also create potential entry points for moisture, air, and pests. Proper sealing ensures your fixtures perform reliably while protecting your home's structure and energy efficiency. This guide will walk you through everything you need to know about sealing exterior lights effectively.
How Fixtures Create Vulnerabilities
Whenever you install an exterior light fixture, you're making a little opening in your home's protective barrier. While these openings are necessary for electrical connections, it's important to ensure they're sealed properly to keep your home safe and secure.
Moisture Entry
Water infiltration through poorly sealed fixtures is one of the most serious threats to your home. When moisture gets behind fixtures or into electrical boxes, it can lead to several costly problems:
- Mould and mildew growth in wall cavities
- Wood rot that compromises structural integrity
- Electrical hazards from water contacting wiring
- Paint and finish damage on surrounding surfaces
Canadian weather, with its freeze-thaw cycles, makes this issue even more critical. Water that seeps in during milder periods can freeze and expand, creating larger gaps and more serious damage.
Air Leaks
Unsealed gaps around exterior fixtures allow conditioned air to escape and outside air to enter your home. This constant air exchange forces your heating and cooling systems to work harder, directly impacting your energy bills. In Canada's climate, where heating costs represent a significant portion of home expenses, every sealed gap contributes to meaningful savings.
Pests & Debris
Small gaps around fixtures provide perfect entry points for insects, spiders, and other unwanted guests. These pests often find electrical areas particularly attractive because they're warm and protected. Even worse, some pests may chew on electrical wiring, creating serious fire hazards.
Installation: Get it Right from the Start
Proper installation is your first line of defence against moisture and air infiltration. Taking the time to do this step correctly will save you from problems later.
Preparing the Mounting Surface
Start with a clean, dry surface for the best adhesion. Remove any old caulk, paint chips, or debris from the area where your fixture will mount. A clean base ensures your sealant bonds properly and creates an effective barrier.
Understanding the Mounting Plate and How It Works
The mounting plate is a critical component of outdoor light fixture installation. Acting as the intermediary between your light fixture and the wall, this plate ensures a secure, stable, and properly aligned setup
- Alignment and Support
The mounting plate is designed to align perfectly with the hole in the wall or the electrical box. This proper alignment ensures that the fixture is evenly supported, preventing wobbling or uneven seating that could compromise its performance or appearance over time. - Wire Management
Many mounting plates feature openings or channels specifically designed to manage electrical wires. These pathways help guide the wires, keeping them protected and organized during installation. This organization minimizes the risk of damage or tangling, which is especially important for ensuring safe and reliable electrical connections. - Sealing and Protection
When paired with a waterproof junction box and properly applied sealants, the mounting plate contributes to sealing the area around the fixture. It creates a foundational barrier that keeps moisture, air, and pests from entering through the fixture's base. - Fixture Attachment
The mounting plate acts as the anchor point for securing your light fixture to the wall. Once positioned and bolted into place, the fixture is attached to the mounting plate using screws or other fasteners. This ensures the fixture remains hardy against wind, weather, and accidental bumps.
Having the mounting plate properly installed and aligned is essential to the overall durability and reliability of your exterior light fixtures, making it a key player in preventing potential issues down the line.
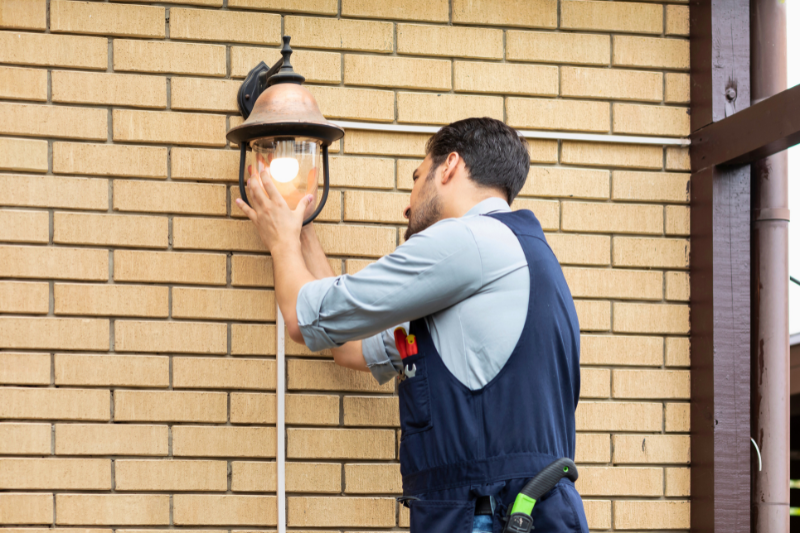
Installing the Light Fixture
Follow the manufacturer's instructions to securely install the light fixture. Align the mounting plate with the electrical box, making sure the electrical wires are correctly connected and kept inside the box to prevent exposure. Once the mounting plate is firmly attached to the wall, set the fixture onto the plate and secure it with the screws or brackets included in the installation kit. Double-check all connections to ensure everything is tight and stable. When in doubt, bring in an electrician!
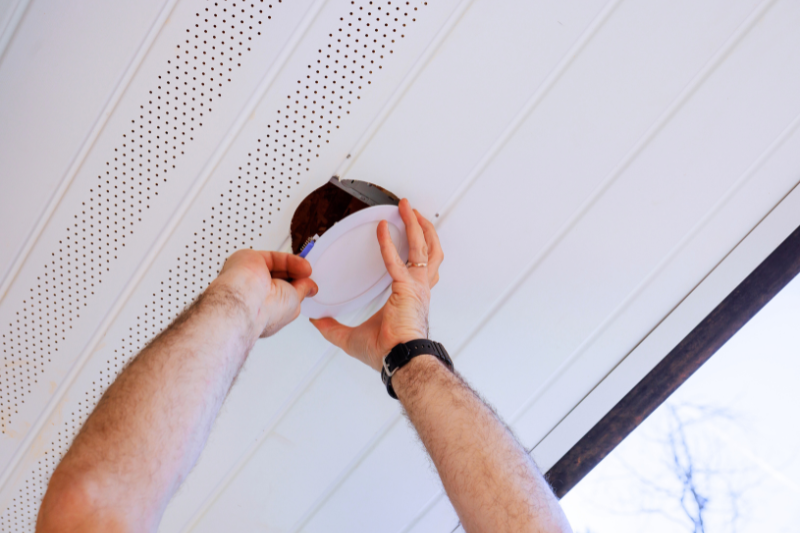
Applying Sealant During Installation
Here's where proper technique makes all the difference:
- Cut your sealant nozzle at a 45-degree angle to create a clean, controlled bead.
- Apply a continuous bead of sealant around the fixture base where it meets the wall.
- Leave a small weep hole at the bottom to allow any trapped moisture to escape.
- Tool the sealant smooth using your finger dipped in water or a specialized tool.
The weep hole is especially important because it prevents water from becoming trapped behind the fixture, which could cause damage over time. By understanding the role of the mounting plate and being careful during installation, you'll establish a stable, well-sealed foundation for your outdoor light fixture, protecting your home while maintaining functionality and aesthetics.
Post-Installation Maintenance
Regular maintenance keeps your seals effective and your home protected. Plan to inspect your exterior fixtures at least twice yearly—spring and fall are ideal times.
Look for signs that your seals need attention:
- Cracks or gaps in the sealant
- Discoloration around the fixture base
- Loose or wobbly fixture mounting
- Water stains on interior walls near fixtures
Address any issues promptly. Minor problems are much easier and less expensive to fix than major water damage or structural issues. Remove old sealant completely before resealing to ensure a strong, lasting bond. Skipping this step can lead to weak seals and potential problems down the line. Learn more about proper resealing techniques in our blog.
Recommended Sealants for Outdoor Fixture Sealing
Choosing the right sealant for your specific application ensures long-lasting protection. Here are three excellent options for exterior fixture sealing:
DYNAFLEX 230 Premium Elastomeric Sealant
This latex-based sealant offers excellent all-around performance for most exterior sealing applications:
- Paintable in 2 hours: Perfect for blending with exterior finishes around light fixtures.
- Highly flexible and crackproof: Handles temperature and humidity changes without compromising the seal.
- 100% waterproof and weatherproof: Ensures long-lasting protection against moisture infiltration.
ULTRA CLEAR Flexible All-Purpose Waterproof Sealant
This crystal-clear sealant adheres to wet surfaces and provides immediate rain readiness, making it ideal for unpredictable weather conditions:
- Crystal clear and non-yellowing: Maintains a seamless, invisible finish around light fixtures.
- Adheres to wet or damp surfaces: Ideal for outdoor applications where conditions may not always be dry.
- Immediate water and rain readiness: Provides instant protection, even in unpredictable weather.
![]()
SILICONE ULTRA Window & Door Sealant
For maximum performance in harsh weather conditions, this 100% silicone sealant delivers:
- Exceptional flexibility (+/-50% joint movement): Ideal for extreme weather conditions and joint expansion/contraction.
- Rain-ready in 30 minutes: Quick curing time for fast project completion.
- UV, mould, and mildew resistant: Provides durable protection for outdoor applications.
Learn More: If you’re unsure about the differences between latex and silicone sealants and which might work best for your specific project, check out our detailed comparison guide.
A Critical Safety Warning About Spray Foam
While spray foam insulation can be tempting for sealing gaps, never use spray foam directly over electrical wiring or fixtures. Spray foam insulation should not be applied directly against electrical wiring, fixtures, or recessed lighting unless specifically rated for contact with insulation. The foam can cause components to overheat, creating serious fire hazards.
When it comes to your outdoor lighting fixtures, a durable bead of caulk is more than enough.
Additional Protection Tips
Beyond proper sealing, these strategies from David, Founder of ZY Lighting, can further protect your outdoor lighting. Consult his helpful article next!
- Install Lights in Sheltered Locations When Possible
Position fixtures under eaves, overhangs, or other protected areas when your design allows. This reduces direct exposure to rain and harsh weather. - Secure Fixtures and Wiring to Withstand Wind and Impact
Use appropriate fasteners for your fixture weight and wall type. Secure any loose wiring to prevent damage from wind or accidental contact. - Use Weatherproof Electrical Connectors and GFCI Outlets
Invest in quality weatherproof electrical components. GFCI outlets provide additional safety by cutting power if moisture causes electrical irregularities. - Adding Waterproof Shields or Covers for Extra Protection
In particularly harsh environments, consider adding physical shields or covers to deflect water and debris away from your fixtures.
Keep Your Home Protected
Properly sealing exterior lights and fixtures is a straightforward project that delivers significant benefits. By preventing moisture infiltration, air leaks, and pest entry, good sealing protects both your home's structure and your energy bills.
The key is using quality materials like DYNAFLEX 230, ULTRA CLEAR or SILICONE ULTRA sealants and applying them correctly. With regular maintenance and prompt attention to any issues, your exterior lighting will provide years of reliable service while keeping your home's protective envelope intact.
Remember, small investments in proper sealing now prevent much larger problems later. Take the time to do this project right—your home and your wallet will thank you for it.
Sources
David. (2024, June 10). How to Protect Your Outdoor Lighting from the Elements and Enhance Your Exterior Space. ZY Lighting. https://zylighting.com.au/blogs/lighting-tips/how-to-protect-your-outdoor-lighting-from-the-elements-and-enhance-your-exterior-space
Malone, J. B. (2021, September 16). Should you caulk around exterior lights, fascias and outlets? Caulfeutrage Apex. https://calfeutrageapex.com/caulkings/should-you-caulk-around-exterior-lightsfascias-and-outlets/